Are you looking for the best way to get a perfect finish with a paint sprayer? You need to know how to properly prepare your surfaces before using a sprayer. In this guide, we’ll provide you with all the steps you need to take for preparing any surface and make sure your paint sprayer projects turn out just right.
Paint sprayers are great tools for completing a variety of painting projects quickly and with professional results. They can be used to paint anything from furniture and fixtures to walls, ceilings, and building exteriors.
However, in order for paint sprayers to produce the desired results that you expect, proper preparation must be taken prior to use. Surfaces must first be cleaned and appropriately prepared in order to ensure that the job is done properly.
This guide will provide an overview of what needs to be done in order for you to get the best possible end result when using a paint sprayer for your next project.
Explanation of the importance of preparing surfaces before using a paint sprayer
A paint sprayer is an effective and efficient way to apply a professional-looking coat of paint, but it’s only as good as the surface it’s applied to. Inadequate preparation can lead to an uneven finish or bubbling, which ruins the look and can lead to peeling or premature wear. Proper preparation therefore lies at the heart of a successful painting job.
Here are some tips on properly preparing your surface before using a paint sprayer:
- Clean the surface: One of the most important steps in preparing a surface for painting is cleaning it. Using soap and water or an appropriate cleaning product to remove any dirt, dust, or other debris that might interfere with your new coat of paint. Also, if you are painting over any existing wax seals or fillers, make sure to clean them off thoroughly before applying your new layers.
- Sanding: Taking off old layers of finish often requires sanding in order to prepare a uniform bonding surface for the new paint coat. Make sure you sand all down irregularities such as bumps or dips with medium grit sandpaper until you’ve made an even plane. Sanding also helps remove dirt build-up on surfaces for smoother coating results when spraying indoors such as walls and ceilings inside homes and offices.
- Priming: Priming is another important step in preparing surfaces before using a paint sprayer; this ensures that all surfaces have improved adhesion so they don’t peel off after application and speeds up drying times so that coats take less time between applications which can save significant time overall. The type of primer used depends upon the material being painted since some require special chemical primers while others do not require special primers at all.
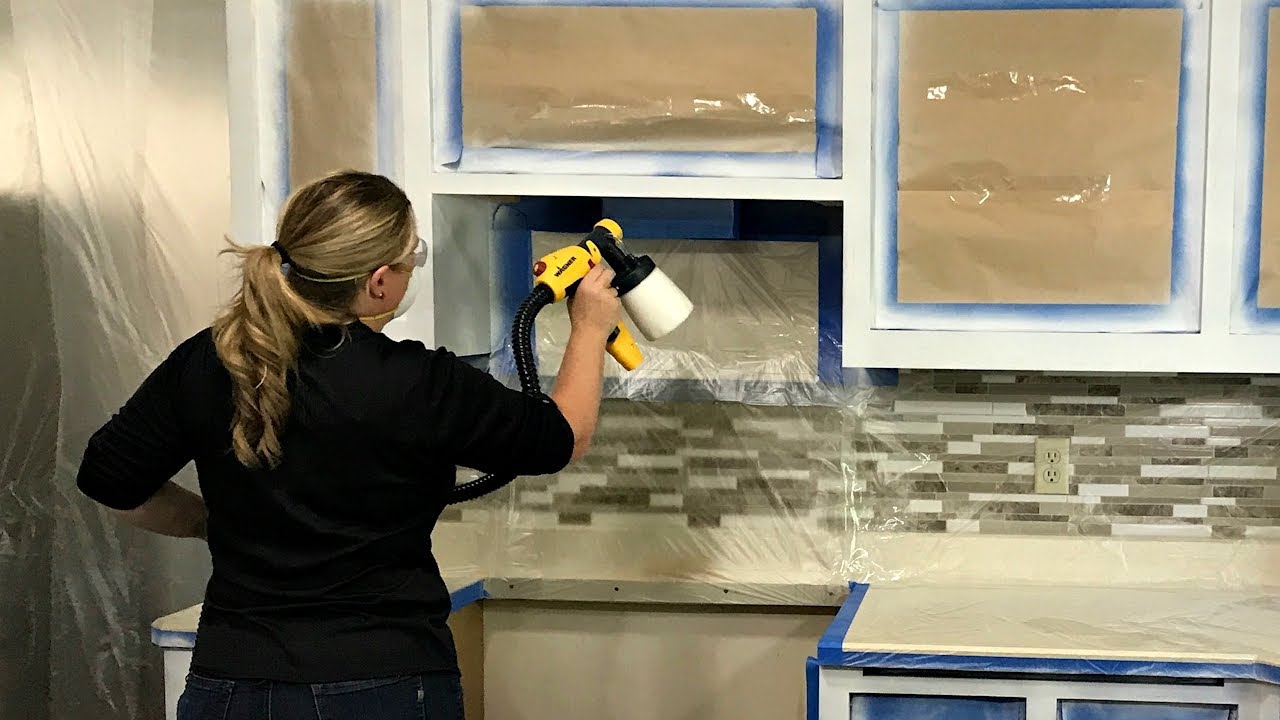
- Masking: Using painter’s tape around edges and edges to keep overspray from getting onto objects like floors and walls will help preserve their condition during painting projects with a sprayer gun. Finally, moving furniture and other objects out of rooms before spraying overhead areas can help prevent unnecessary accumulation of paint droplets on these items when spraying upwards on higher places like ceilings above stairs etc.
Overview of the steps involved in preparing surfaces
When preparing surfaces for painting, there are several steps that must be taken in order to ensure professional results. Preparation is key to achieving a clean, flawless finish; neglecting this process can result in an uneven finish or unappealing texture on your walls or woodwork. To ensure success, make sure everything is properly prepared prior to firing up the sprayer.
Here is a quick summary of the steps you should take:
1) Clean the surface: Begin by brushing or vacuuming away any dust and debris from the area. Use a damp cloth to wipe down the surface and check for any wet spots or debris that may interfere with your coating’s adhesion. This step is essential for achieving uniform paint coverage.
2) Remove old paints & finishes: If you’re painting over an older surface, use a scraper or sandpaper—depending on its condition—to remove any old paints and finishes before applying any new coats of paint. This will provide an adhesive base for your new coat and help reduce any potential issues that could arise from incompatible types of paint being applied over each other.
3) Sand & fill: Once you’ve removed all previous finishes and dried off any dampness on the surface, sand it down with 150-grit sandpaper (or finer). Then move onto filling in any cracks or holes with wood putty and let it dry thoroughly before continuing onto your next step. Be sure to sand away any excess putty afterward as well.
4) Prime & seal: Before hitting the sprayer, apply primer to the entire surface you intend on spraying (both painted and unpainted areas). This helps create a consistent appearance throughout so that you don’t end up with splotchy sections caused by different shades of bare wood absorbing different levels of paint. After letting the primer dry off completely, touch up areas as needed and seal them off according to manufacturer instruction prior to beginning your painting tasks at hand.
Tools and Materials
Having the right tools and materials for surface preparation is essential to ensure that your paint sprayer achieves optimal results. Surface preparation will depend on the type of material you are working with, so it is important to double check before you begin. For example, metal surfaces require thorough cleaning and may even need to be stripped of paint before they can be painted.
Tools and materials you may need include:
- Stripper – often used for wood, metal, or plaster objects to remove old finishes.
- Masking Tape – used to cover surfaces you do not want painted.
- Sandpaper or Power Sander – used to make a surface smoother or rougher depending on the painting task at hand.
- Steel Wool – used for light sanding and rust removal from metal surfaces.
- Block Plane/Belt Sander – also used for light sanding and rust removal from metal surfaces.
- Painter’s Tape – best for delicate surfaces that need protection during painting projects.
- Dust Masks/Respirators – these protect your lungs from breathing in any dust particles during preparation tasks such as sanding or stripping.
List of necessary tools and materials for surface preparation
Preparing the surface for paint spraying is one of the most important steps in painting a smooth and even coat. The type of sprayer you use will define the required tools and materials, but regardless of the type, you’ll need to gather some basic items. Using the following list of necessary tools and materials for surface preparation, you can make sure that your sprayer works correctly and gives you a smooth finish.
Tools:
- Sandpaper: pick up sand paper in various grits depending on how much sanding needs to be done.
- Brushes: Select brushes with firm bristles that can reach every corner and crevice.
- Rollers: You’ll need some type of roller to apply primer or other base coatings quickly and evenly.
- Masking Tape: A must-have tool when it comes to masking off areas during spray job preparation.
- Drop Cloths: Keep your workspace neat by using drop cloths to protect flooring from dripping paint or primer spills.
- Empty Cans/ Containers: Empty cans or other containers are perfect for storing excess paint, primer, or other liquid materials between uses so they don’t dry up completely between jobs.
Materials:
- Primer: A good quality interior/exterior primer is essential for making sure that your finished walls look great in the end.
- Primer Sealer: A good sealer helps protect the wall from damaging moisture, improves adhesion of the finish coat, and keeps unwanted odors out.
- Paint Additives: Paint additives can help improve adhesion while reducing settling time or develop a special effect like a textured finish with anti skid additives.
Description of each tool and its function
With the right tools and a bit of knowledge, you can easily and accurately prepare surfaces before using a paint sprayer. Although there are a variety of different tools available for this purpose, it is important to understand each one to ensure that your sprayer is used properly. In this guide, we will discuss the various types of tools and their functions so that you can make sure your project goes off without any hiccups.
Sandpaper: Sandpaper is an obvious choice for preparation when painting or staining surfaces. This low-cost option does a great job at providing an even surface for painting by sanding down any bumps or dips in the wood or wall material. Additionally, by using various grits of sandpaper, you can achieve different levels of smoothness in your finished project.
Hand scraper: Hand scrapers are helpful when dealing with intricate surfaces like window frames or small areas on furniture pieces that may not be easily reached with sandpaper. This tool gives you tight control over how much material is being removed and allows for precise edges around those hard-to-reach places.
Paint remover: Paint remover may be necessary if your walls have old paint on them as prepping with just sandpaper could damage the existing surface further. The paint remover should render most paints absent after applying and then scrubbing it twice with a damp cloth. Make sure to read all instructions included on the product label before application!
Putty knife: A putty knife can come in handy if there are larger areas where paint has been chipped away or patches where mildew has built up on walls over time that need scraping off before painting commences. Its sharp edges are ideal for removing any old caulking from windows; however, as always safety comes first—be sure to wear gloves and proper protective clothing when doing this task by hand!
Surface Cleaning
Surface cleaning is a critical step in the painting process and can oftentimes make the difference between a good, long-lasting paint job and one that is sub-par. It is important to ensure that any dirt, dust, or debris are removed from the surface you want to paint with a cleaning solution. This will help ensure that all paint layers adhere properly, creating an even and durable finish. Here are some methods for surface preparation before using a paint sprayer:
1) Use a vacuum cleaner or brush to remove dust, dirt and other particles from the surface area. Make sure to focus on corners and areas where dust may accumulate.
2) Use cloth rags and a mild cleaning solution (i.e., dish soap diluted in warm water) to wash away any further debris or grease on the surface of wood or metal fixtures.
3) Allow the cleansed surfaces to dry fully before applying any new coats of paint with your paint sprayer.
Explanation of the importance of cleaning surfaces before painting
Surfaces must be thoroughly prepared before painting or any other coating is applied. This means understanding how the existing substrate stands up to demands of the adhesion process, inspecting the old layers of paint, and choosing the right cleaning materials to ensure a proper bond between surfaces. Without taking these steps, even the best quality paints and coatings may not produce satisfactory results.
Cleansing surfaces of dust, dirt, rust, efflorescence, fungi, mold and graffiti prior to painting will help ensure superior results in look, durability and adhesion. It is important to use the right combination of cleaning supplies in order to obtain optimal results when using a paint sprayer.
The first step is to scrape away any loose paint that may be present on the surface you are going to apply your new layer of coating. Areas with chalking or peeling paint indicate there may be underlying problems due to moisture or dirt contamination which should be addressed prior to making any repair or recoating decisions. After removing all loose flaked or worn material from the substrate it may also benefit from being wet down with a low-pressure cleaner before proceeding with further preparation for painting or re-coating tasks. This will reduce dust particles on surfaces enabling better contact with paints for improved adhesion properties when curing and weathering processes take place in times ahead.

Different cleaning methods for different surfaces
Different surfaces require different cleaning methods in order to ensure that they are clean and free from any dirt, grease, or dust that could affect the quality and finish of your paint job when using a paint sprayer. Depending on the type of surface you’re preparing, some materials may require only a simple wipe down with a microfiber cloth whereas others require more serious cleansing techniques. Knowing the best method for each surface is essential for having an efficient painting project.
Glass – Use window cleaner or warm soapy water to remove any sticker residue, grime or fingerprints.
Wood – Wipe down with a damp cloth or sand lightly with fine grain sandpaper and follow with steel wool if necessary to remove oxidation and rust out if needed.
Metal/Aluminum – Fill sink with warm soapy water and use steel wool to scrub away dirt, grease and fingerprints. If necessary use mineral spirits as a degreaser.
Plastic/Fiberglass – Sponge down area with designated plastic cleansers such as Resolve All Purpose Cleaner followed by rinsing off the area with warm water.
Brick/Stone – Sweep brick or stone surface free of debris then hose it down if it’s outdoors or sponge if indoors further wiping all areas completely dry before painting.
Concrete/Stucco – Hose concrete or stucco surface using high pressure washers until all embedded dirt, dust & soil is gone then scrub weak areas that didn’t wash away properly using TSP (trisodium phosphate) dissolved in water solution before rinsing thoroughly again. Once done & dry, go over entire concrete surface using brush broom & vacuum cleaner throughout before priming & painting begins!
Tips for effective cleaning
When spraying surfaces, proper cleaning is essential for achieving a professional finish. This is because imperfections such as dust, dirt, and grease can cause an uneven coating. To ensure that your paint job comes out perfect, you’ll need to clean the surfaces thoroughly. Here are a few tips for effective surface preparation:
1) Remove all dust and debris: Start by getting rid of all loose pieces of dirt, dust and other debris from the surface you are about to paint. Use a brush if necessary but make sure to get rid of all the dirt from crevices so that it doesn’t interfere with a smooth finish.
2) Clean oil or grease: For any surfaces that have oil or grease on them, you’ll need to remove it using a high-quality degreaser or detergent. Make sure to do spot tests with your cleaner before using it on the whole surface so that you don’t cause any damage or discoloration.
3) Use damp cloths: After using detergents or degreaser on the surface, use damp cloths to wipe it down one last time before starting the painting process. This will make sure that no residue is left on the surface which can affect paint adhesion in unpredictable ways or leave behind streaks in your coating when dried.
4) Prime wood and metal first: If your project involves painting wood or metal surfaces (such as for furniture), then you should always prime them first before applying paint with a sprayer. Primers help seal off pores in these materials and give them an even texture so that paint adheres better when sprayed onto them later on in the process.
Surface Repair
In order to get a quality finish using a paint sprayer, it is essential to have a properly prepared surface. It is important to repair any damage to the surface before painting begins. In some cases, the entire area may need to be sanded and prepared for priming.
Depending on the material being worked on, repairs may include filling in holes or cracks with putty or caulk and spot-sanding any rough spots.
Once repairs are complete, it is necessary to give the surface a thorough cleaning and degreasing. This will ensure that the paint adheres properly when sprayed onto the surface. It is also important to remove any dust or particles that could interfere with paint coverage.
Make sure to apply any primer recommended by your paint sprayer manufacturer prior to painting. Primers come in different formulations depending on what type of material you are preparing, so be sure you know what’s best for your project before beginning your work.
Identification of common surface defects
Properly identifying the defect type on a surface is key to determining the appropriate remedy before beginning a painting job. Common surface defects are often caused by aging, moisture, heat, improper cleaning or sanding and lack of preparation. Here are some common issues to look for and what to do about them before painting with a sprayer.
Peeling/Flaking: This issue is caused by weak adhesion on a substrate or it may be due to an incorrect or inadequate cleaning prior to paint application. In both cases, surfaces need to be correctly cleaned and rough sanded prior to priming and painting. Or, in the case of metal substrates specifically, abrasive blasting may help restore adhesion.
Fogging/Alligatoring: This occurs when the top paint layer has dry-wronged (lost its flexibility) due to age and is not letting new layers of paint adhere properly or evenly. The affected areas should be scraped and washed with detergent soap before applying primer/paint sealer. If applicable, adding vinyl sealer may minimize future cracking in areas prone to movement such as window sills or door molds.
Cracking: Depending on the severity of cracking seen on surfaces (i.e., cracks that go through multiple layers of paint), complete scraping down of surfaces may be necessary in order for new primer/paint layers to properly adhere without any future priming issues occurring shortly after application. It is also highly recommended that using high quality primer/paints will greatly promote additional flexibility within each layer which offsets this potential outcome from occurring again in the short-term future.
Techniques for repairing surface defects
The quality of the end result of your painting project will depend on the condition of the surface before you begin. You may need to take special steps to prepare your walls, such as filling in small holes, removing wallpaper or washing away any existing dirt and grime. Walls with medium-sized defects should be patched and covered in one or two coats of primer prior to spray painting. This ensures that tape lines do not last, and that the edges blend into a seamless finish. If there are any large defects that have holes or pits in them and cannot simply be filled with joint compound, they should be repaired properly prior to priming.
When making repairs, whether it’s large or small corrections, you should use tools like sandpaper and scrapers to smooth out surfaces and display an even finish. By lightly sanding the damage, you can ensure an even texture across all surfaces for better results when using a paint sprayer. It’s important to remove all dust from these areas after sanding; otherwise, the dust could create obstacles for a flawless finish when using a paint sprayer. You should also use products designed specifically for patching materials like wood filler for wood repairs or spackle if repairing drywall areas.
Finally, it is imperative that any areas being repaired are sealed correctly following repair procedures so that no moisture can penetrate through them during painting. That way, even layers of sauce can be guaranteed despite existing defects in your walls before construction began. Taking these simple steps will ensure smoother paints and better finishes following the completion of your project today!
Conclusion
In conclusion, properly prepping your work surface before using a paint sprayer is an essential step to ensure that the end product will look great. Preparing surfaces takes time and patience but if done correctly, it can lead to an incredible, professional-looking finish. Here are the main steps you should take when preparing surfaces before using a paint sprayer:
- Clean: Thoroughly remove any debris and dust that may interfere with the process.
- Prime: Priming is necessary, as it ensures that paint adheres better and lasts longer.
- Sand: Sand all rough spots in order to create a smooth surface for painting.
- Mask: Use masking tape and paper around areas you do not want painted.
- Test: Test the paint backward on an area of scrap wood to ensure proper coverage and reduce imperfections.
Finally, always practice safety when spray painting surfaces – wear safety glasses and protective clothing when spraying!
FAQ’S
How do you prepare a surface for spray paint?
The surface should be clean, dry, and free of any grease, oil, or debris. Sanding or using a primer may also be necessary depending on the type of surface.
Do I need to prep a surface for spray paint?
Yes, surface preparation is crucial for achieving a smooth and even coat of spray paint.
What do I need to know before using a paint sprayer?
You should know the proper technique for using the sprayer, how to choose the right type of paint, and how to properly maintain and clean the equipment.
How do you protect surfaces when spray painting?
Use masking tape, drop cloths, or plastic sheeting to cover surfaces that you don’t want to get paint on.
Do I need to sand before spray painting?
In many cases, sanding is necessary to ensure the surface is smooth and free of imperfections before applying spray paint.
What is surface prep spray?
Surface prep spray is a product that is used to clean and prepare a surface for painting.
What surface is best for spray paint?
Smooth and non-porous surfaces like metal, plastic, and wood are ideal for spray painting.
Is spray painting better than roller?
It depends on the project and the desired outcome. Spray painting is great for large surfaces, while a roller may be better for smaller areas or for achieving a textured finish.
What do you spray paint first?
Start with the largest surfaces first and work your way to smaller areas, ensuring that each coat has fully dried before applying the next.
Do I need to mix paint with water for sprayer?
It depends on the type of paint and sprayer you are using. Follow the manufacturer’s instructions for the correct ratio of paint to thinner or water.
See Also:
- Best indoor paint sprayer
- Best sprayer for latex paint
- Best professional paint sprayer
- Best paint sprayer
- Best paint sprayer under $100


