Have you ever wondered how professionals get that perfect finish on their painting jobs?
Well, the secret lies in investing in a paint sprayer! But it’s important to understand how to use one safely and effectively.
In this guide, you’ll learn everything you need to know about using a paint sprayer right!
This complete guide covers everything you need to know about using a paint sprayer safely and effectively. This guide is designed to offer detailed advice on paint selection, preparation of the surface, prep work such as masking off surrounding areas, priming, how to clean and maintain your sprayer and other related tips.
Explanation of what a paint sprayer is
A paint sprayer is an ideal tool for fast and efficient application of thin-bodied materials such as stains, sealers, primers and paint. Paint sprayers use compressed air to literally atomize the material into a thousand tiny droplets and force them out of the nozzle onto the surface at high speed. This produces an even and laminar flow, with little or no overspray and a consistent texture on the surface. The result is a beautiful finish that is much faster to achieve than roller or brush application.
Paint sprayers are available in a variety of styles to match different types of projects or working environments. HVLP (high volume/low pressure) units are ideal for DIY projects as they atomize materials relatively efficiently with minimal overspray, while airless paint sprayers are often used for commercial projects due to their high turning capability, reduced waste and accurate application.
No matter what type of paint sprayer you choose, it’s important to use the correct set up techniques to get optimal results when painting or staining your project. Proper care should also be taken to protect yourself from harm while using any type of paint sprayer by following local safety regulations as well as manufacturer’s instructions.

Importance of using a paint sprayer safely and effectively
Using a paint sprayer carries with it certain risks. To ensure your safety and that of those around you, there are essential guidelines to follow when utilizing a paint sprayer. It’s important to understand the potential hazards involved in safety-related issues relating to this equipment, as well as how to recognize and prevent them in order to make sure that your paint spraying job is safe and effective.
Before operation, common checks should be performed including; an inspection of the equipment for any wear and tear, loose screws or corroded parts; checking for correct operation of all hoses and fittings; confirming air tight seals; determining that all guards are fitted correctly; inspecting nozzles for proper dimensioning; checking filter baskets for adequate filtration levels; ensuring operable pressure relief valves; ensuring proper exposure control methods are applied (such as air masks or ventilation); and finally verifying that the control system is functioning properly.
In addition, each time you use your paint sprayer you should check the product compatibility by testing it on a non-visible area prior to operation. It’s also important to make sure that the surrounding environment is a safe one, free from combustible material such as easily flammable liquids or solvents which could potentially ignite during painting.
When spraying materials such as lacquers or inflammable substances, take full advantage of fire sprinklers or other active fire protection systems around the area being worked on – material safety data sheets can also be valuable reference points here. It’s always best to use a reliable fume extraction system – such devices are designed specifically for hazardous dusts generated through painting processes – such devices capture and extract any fine particles at their source thus eliminating health risks associated with inhalation when painting in confined spaces. Finally, electrical cords & cables must always be kept away from heated surfaces during operation of painting equipment – proper eye protection should also be worn at all times during use in order to minimize risk from overspray & mist (i.e goggles or face shields).
Preparing for Use
Before you start using a paint sprayer, it is important to make sure all of the necessary safety measures are taken to ensure your safety and that of those around you. First and foremost, prepare the area you will be working in so that it is clear of dust and debris. Clothes should be tucked in, masks or respirators (if they must be used) should be worn, and any long hair should be tied back. Additionally, cover any surfaces or objects that are not meant to have paint on them with plastic sheets or drop cloths.
Once everything is ready for use, inspect your sprayer for any issues or defects with the air cap, hose connections, nozzle seals and needle bearing assemblies. If there are any signs of damage or wear-and-tear on these components, replace them before continuing.
Once everything has been checked over and deemed safe to use, you can then assemble and set up your paint sprayer. This will involve connecting air hoses to the compressor end if needed as well as filling the tank with paint or other painting materials such as lacquers, varnishes and stains depending on what you are spraying. Make sure that all connections are secure before beginning work with the gun since otherwise you may risk a hazardous leak while spraying which would not only ruin whatever job you are working on but also put yourself in danger due to having flammable substances shooting through the air uncontrollably.
Safety gear needed
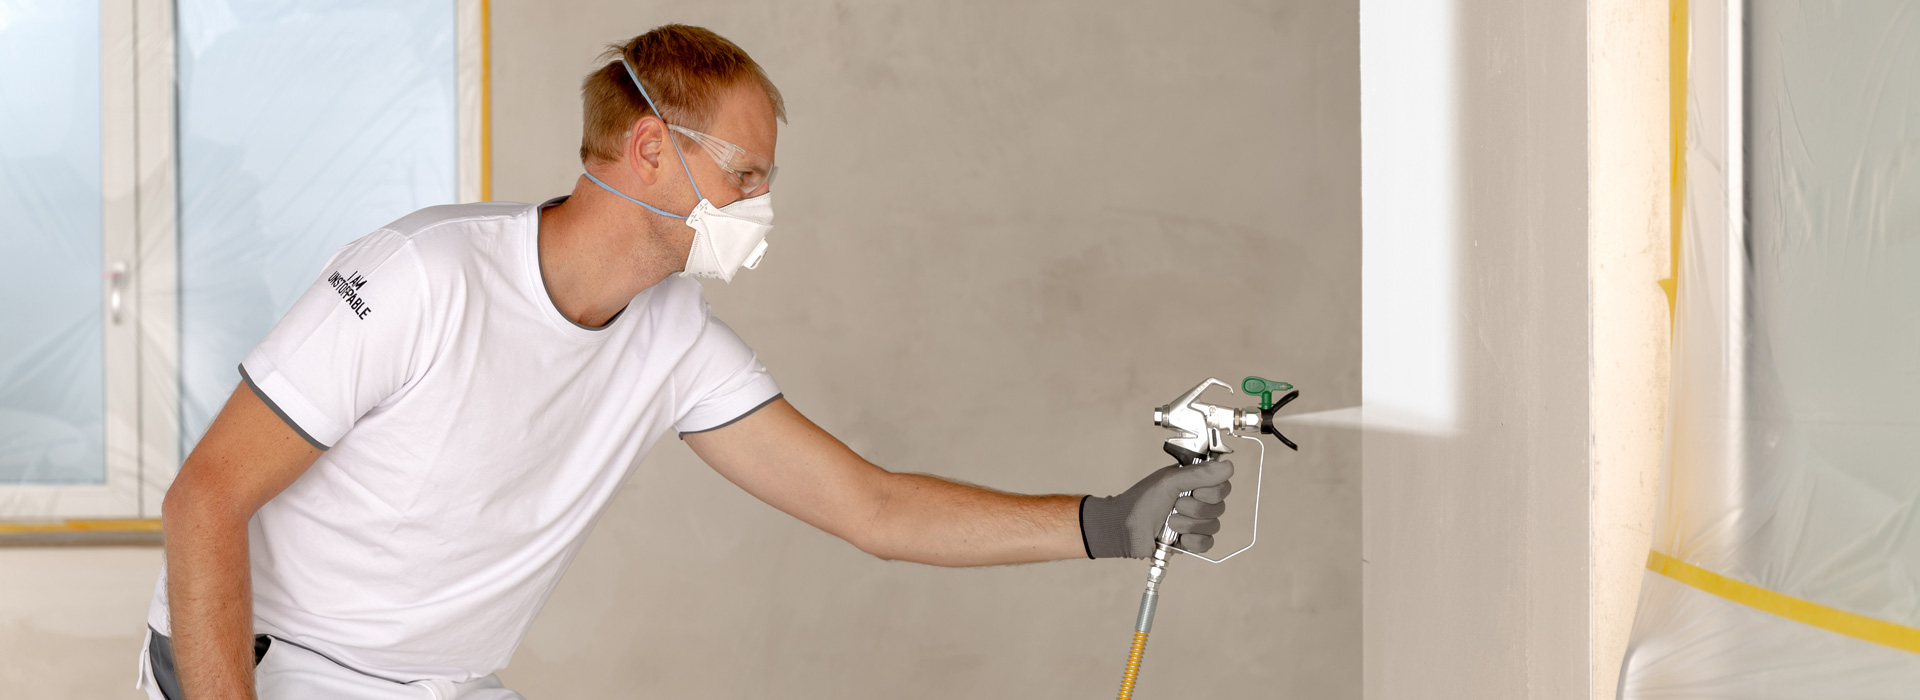
Before starting any paint project, you should always be sure to wear the proper safety gear in order to protect yourself from the potentially harmful fumes and particles released when using a paint sprayer. For this reason, you should ensure that you equip yourself with the following items:
– Respirator: A respirator is an important piece of safety equipment since it is designed to filter out any airborne particles or irritants that could damage your lungs. When looking for one, make sure to get one that is specifically designed for use with a paint sprayer; these will have stronger filters than ones meant for general use.
– Protective eyewear: Goggles or glasses should also be worn when painting; they will protect your eyes from getting sprayed with stray bits of paint. Additionally, they can also provide additional protection if anything malfunctions while spraying.
– Clothing: Ideally, clothing that covers as much of your skin as possible is ideal when using a sprayer; this will help keep unwanted particles away from your skin and clothes. Additionally, avoid wearing loose clothing that may flap around and get caught in the paint sprayer’s nozzle or fan.
– Gloves: Wearing heavy-duty rubber gloves can help prevent skin irritation or potential allergies resulting from contact with chemical compounds in some paints or coatings; additionally, they can provide better grip on slippery surfaces like plastic or metal nozzles and parts of the sprayer itself.
Setting up the workspace
Before you start using the paint sprayer, it is essential to set up a suitable workspace. Whether you are working inside or outside, you should make sure the area is well-ventilated and properly lit. It’s important to remove any furniture or carpets from the area to protect them from paint splatter and fumes. If necessary, cover up windowsills and door frames with newspaper or towels. Furthermore, make sure that your workstation has a stable surface, as this will help ensure that you don’t damage your equipment as you use it.
It’s also very important to read the manufacturer’s instructions carefully. This will help ensure that you are using the equipment safely – knowing how much pressure to apply, for instance – and getting the best possible results from it. Make sure that all of the parts are securely tightened before beginning any painting project.
Finally, make sure that there are no flammable materials near your workspace, as any sparks could cause an explosive reaction!
Choosing the right paint and sprayer
Before beginning to paint, you must decide which type of paint and sprayer is best for your project. A wide range of paints are available for use with a painting sprayer, including oil-based, water-based, and specialty paints. Each type of paint is designed to adhere to specific surfaces such as wood, drywall, or metal. For example, oil-based paints are an ideal choice for wood surfaces while water-based paints are better suited for most other materials due to their greater water resistance and ease of cleanup when used with a painting sprayer. It is important to read the product labels thoroughly before deciding on the right type of paint so you can be sure to get the best results from your project.
When it comes to selecting a painting sprayer, there is no one size fits all. Factors that should be considered when choosing a painting sprayer include the size and shape of the area you’re painting; how far away from the surface you will be spraying; whether or not there will be any objects in the room that need to be avoided; how long it will take for each coat of paint to dry; and finally, your budget. Airless sprayers are typically used for larger projects such as walls or ceilings while airbrush or HVLP (high volume low pressure) sprayers are ideal for smaller projects like furniture refinishing or cabinetry work. No matter which type of sprayer you choose make sure proper safety practices are being followed at all times while using a paint gun!
Using the Paint Sprayer
Using a paint sprayer can help make painting projects quicker and easier; however, it requires care and both safety and technique to get the job done correctly. Before you begin, ensure that you have all the necessary supplies, such as personal protective equipment such as goggles and an apron, along with an adequate number of drop cloths to protect your flooring or other surfaces from spills or splatters. Additionally, it is important to read through all of the manufacturer’s instructions for use so that you understand how best to operate your specific paint sprayer model before beginning work.
When in use, be sure to keep the nozzle pointed away from yourself and anyone else present during painting. It is advisable to first practice spraying on paper so that you can get accustomed to how much pressure needs to be applied when pushing the handle down. Make sure that the surface being sprayed is smooth and free of any dirt or dust before beginning any spraying operations by lightly wiping down the surface with a damp cloth. When spraying, try moving quickly and steadily back-and-forth rather than pausing anywhere during spray application. As you release pressure from the handle after each stroke, some residual material may appear; this is normal and should be expected but should be wiped away nonetheless for consistent performance when using a paint sprayer. Finally, when finished spraying be sure that all lids are closed firmly included.
Understanding the spray pattern
Paint sprayers are relatively simple tools, yet they can produce amazing results with the right technique. Understanding the spray pattern and adjusting your application style accordingly is key to getting the coating coverage you want. In general, paint sprayers work best when using a “back and forth” or “X-pattern” spraying approach. This method will ensure that all areas of the surface are evenly and adequately coated.
When it comes to changing the focus of your spray pattern, simply adjust your arm speed and/or distance from the surface you are spraying. A slower arm movement will spread the paint more densely over a wider area, while faster movements will deliver a thinner film over a smaller area for more accurate coverage in tight spaces or for creating effects like shading or blending colors together. Generally speaking, a slower arm speed works better for interior surfaces such as walls or cabinetry, while maintaining a faster pace is essential when dealing with metal exterior surfaces like fences and siding.
Just as important as controlling your arm movement is controlling your distance away from the sprayed surface. Keeping too close may cause excessive dripping; standing too far away may result in an unnatural patchy effect. For most projects using an average-sized paint sprayer with nozzles ranging from 2-10mm (1/8-3/8 inches), keeping 10-15 inches away should be sufficient—though this number can adjust depending on size of nozzle used and other factors such as wind speed variation or unevenness of surface being sprayed upon.
Proper technique for spraying
Proper technique for spraying is essential for achieving consistent and desired results when using paint sprayers. To ensure a quality finish, here are a few important guidelines to follow:
-Hold the sprayer at least 10 to 12 inches away from the surface. If you keep it too close, you risk creating an uneven coat.
-Move side-to-side in a continuous motion. Do not stay in one spot or let up on the trigger until the length of spray has passed over your object or surface. Continue evenly over each area until ‘overlap’ takes place (minimizing any gaps).
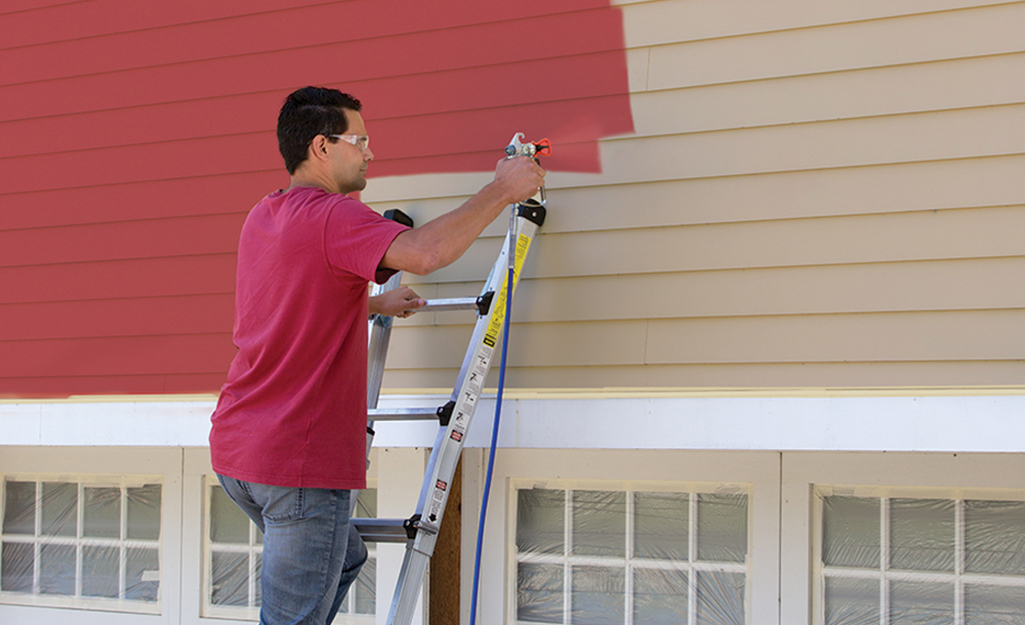
-Point the nozzle downward at a 90 degree angle when painting vertical surfaces such as walls or fences. Use an up and down motion if necessary so that there’s less debris in your wake while also providing even coverage. Avoid pointing it directly at light fixtures or other objects that don’t need to be painted.
-It is important to maintain full control of the sprayer by keeping your arms close to your body and only slightly angling the gun for better control, which will help you avoid any drips around corners or curves. Place painter’s tape along areas such as door and window frames so you don’t create runs, overspray and splatters with your project piece, as well as edges of furniture or cabinets where two different colors will intersect or meet up against one another.
-Apply thin coats of paint and gradually build coverage with multiple passes rather than trying to cover an entire section within one pass. Light coats dry faster than thick ones, providing a smooth finish without drips or blemishes when done correctly.
Maintaining a consistent speed
Maintaining a consistent speed when using a paint sprayer is critical for achieving the best finish. As you start to spray the surface you will want to ensure that you do not stop or slow down suddenly or move the sprayer too quickly as this can cause an uneven application of paint.
It is important to come up with a rhythm that works for you, and use your hand and wrist movements to keep a consistent rate of speed. Taking regular breaks while painting can also help maintain consistency, allowing you time to adjust your speed if needed.
Additionally, if you are working on larger projects it is important to take into account areas where some sections may be more challenging than others. This will help maintain a steady pace while painting and creating an even finish on the surface.
Overlapping strokes
One of the most important techniques to ensure a professional-looking finish when using a Paint Sprayer is to overlap each stroke that you spray. The amount of overlapping you use will depend on the type of nozzle and air cap combination in your paint sprayer as well as your technique and experience with painting.
When spraying with an HVLP (High Volume Low Pressure) paint sprayer, it is important to overlap each stroke by 50%. This will ensure a consistent coat without any heavy build up or thin splotches. With an LVLP (Low Volume Low Pressure) paint sprayer, it is more difficult to achieve this level of overlaps since they generally have less material flow and a narrower fan pattern. However, you should aim to overlap each stroke minimally by 25%, while still keeping a good distance away from the previously coated surface. Keeping a steady speed when moving along the direction of the set item also helps create cleaner and straighter lines. Proper overlapping is essential to ensure adequate coverage and provides uniformity for even final results.
Avoiding drips and runs
When you are using a paint sprayer, proper technique will help to avoid drips and runs. On a vertical surface, start by spraying from the top down and gradually overlapping each stripe until you reach the bottom of the piece. For horizontal surfaces, start at one end and work your way across in a smooth, even motion.
Make sure to keep your distance (three to four feet) close enough that you get full coverage but far enough away that you don’t create too much build up in one area which can cause dripping or running. Additionally, keep both hands on the gun at all times for improved control and accuracy of coverage.
Conclusion
Using a paint sprayer can be a powerful tool for home improvement and big painting projects. By taking the necessary precautions and following the steps outlined above, you can ensure that your project is completed safely, quickly, and effectively. Spray painting provides an even coating, saving you time and energy from brush or roller applications.
Have fun creating beautiful projects with your paint sprayer!
FAQ’S
What are the tips for painting with a sprayer?
Use the right tip size for your project, Hold the sprayer at a consistent distance from the surface, Move the sprayer in a smooth and steady motion, Overlap each pass by 50%, Use a spray shield to protect adjacent surfaces, Practice on a test surface before starting your project.
What are the safety tips of using spray gun?
Wear protective clothing, including eye and respiratory protection, Work in a well-ventilated area, Keep the spray gun pointed away from yourself and others, Never point the spray gun at your hand or body, Keep the spray gun and paint away from flames and heat sources, Follow the manufacturer’s instructions for use and cleanup.
What do I need to know before using a paint sprayer?
Read the manufacturer’s instructions and safety guidelines, Choose the right sprayer and tip size for your project, Prepare the surface by cleaning and priming as needed, Practice on a test surface before starting your project, Use the right type of paint and thin it to the correct consistency, Follow the recommended spraying techniques.
How do you use a paint sprayer for the first time?
Read the manufacturer’s instructions and safety guidelines, Assemble the sprayer and fill it with paint, Adjust the spray pattern and pressure as needed, Practice on a test surface to get a feel for the sprayer, Start painting, working in small sections and overlapping each pass by 50%, Clean the sprayer thoroughly after use.
What are the 3 adjustments on a paint gun?
Fan pattern adjustment: controls the width of the spray pattern, Material flow adjustment: controls the amount of paint being sprayed, Air pressure adjustment: controls the force of the spray.
Is paint sprayer better than brush?
It depends on the project and personal preference. A paint sprayer can be faster and produce a smoother finish, but it requires more setup and cleanup than a brush. A brush may be better for small projects or touch-ups.
What is the basic principle of sprayer?
A sprayer uses compressed air or high pressure to atomize paint into tiny droplets and propel them onto a surface for an even and consistent finish.
What are the qualities of a good sprayer?
Consistent spray pattern and pressure, Easy to use and maintain, Durable and long-lasting, Compatible with a range of paints and coatings, Adjustable settings for different projects.
How many coats of paint do you use with a sprayer?
It depends on the type of paint, the color, and the surface being painted. In general, 2-3 coats are recommended for an even and durable finish.
What are the four basic spray techniques?
Horizontal: moving the sprayer side to side, Vertical: moving the sprayer up and down, Circular: moving the sprayer in a circular motion, Pass overlap: overlapping each pass by 50%.
See Also:
- Best paint sprayer for exterior house
- Best paint sprayer for ceiling
- Best paint sprayer for cars
- Best handheld paint sprayer
- Best hvlp paint sprayer


