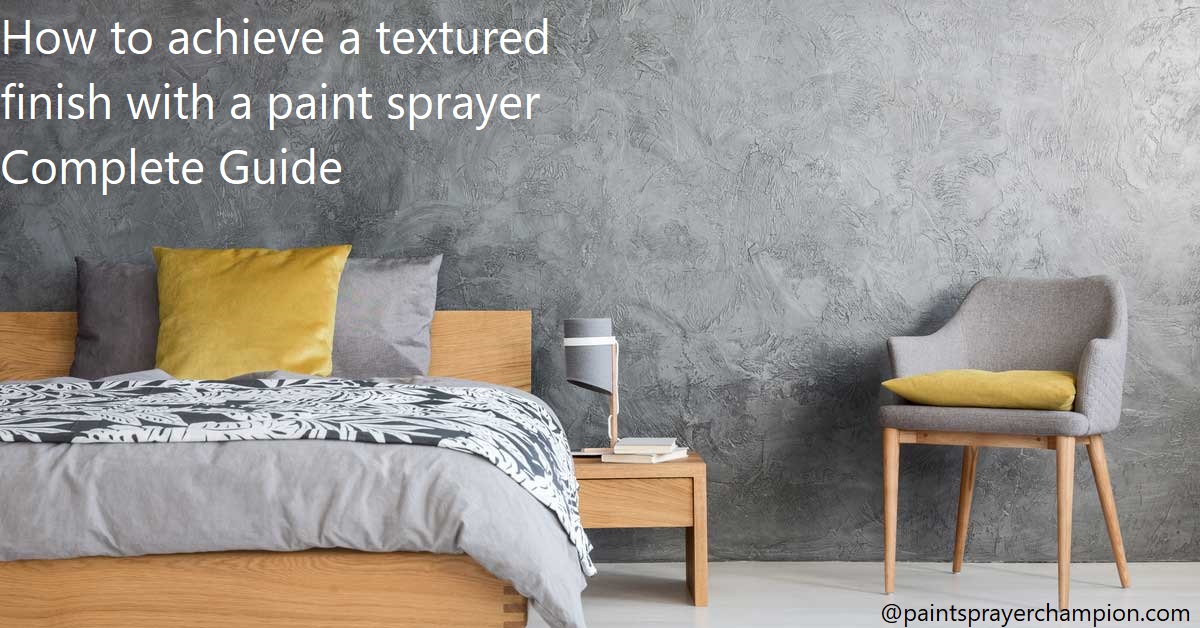
Are you looking for an easy way to create a textured finish with a paint sprayer? Look no further.
In this comprehensive guide, you’ll find out everything you need to know about achieving the perfect texture.
Get ready to transform your walls and ceilings!
This guide is designed to help those who want to achieve a textured finish with a paint sprayer. Painting with a paint sprayer is an economical, quick way to apply a textured finish (also known as stippling) without having to use specialized tools or techniques.
You will learn how to set up your sprayer, prepare the surface, choose the right paint and additives, and adjust the speed and pressure settings for different effects. We will also look at some sample projects where textured finishes make a real difference in home décor.
So whether you’re looking for an interesting pattern on walls or a unique texture on furniture and cabinets, this guide will show you how to get the desired results quickly and easily.
Explanation of textured finish
Textured finishes create an interesting, aesthetically pleasing look that can update the look of any room. While it’s possible to achieve a textured finish with a brush or roller, one of the most efficient ways to do so is with a paint sprayer. With a few simple adjustments and tips, you can achieve a professional-looking textured finish using your paint sprayer.
First, it’s important to choose the right thickness of material for your project. You should select a medium or high-viscosity paint as this will be better suited for creating textures. Additives such as thinners, flow enhancers and rust inhibitors may also be added to the material so that it flows more easily through the sprayer nozzle and maintains its texture once applied.
Next, adjust your pressure regulator appropriately so that when applied to the surface, the paint droplets cling to each other and create small ‘peaks’ in order for light to reflect at different angles rather than in one large blob. Adding more air pressure will allow for more peaks and provide more depth in your finished piece while less pressure adds less texture.
Finally, apply several layers of increasing thinness according to what works best with your desired texture. Be sure not to let one layer dry completely before applying another; if necessary use slow drying sealers such as shellac between layers which will enable you to continue layering without worrying about abrupt drying or cracking on application. If you want an even thicker or visible variation of peaks then consider adding an aggregate such as sand paper particles during blending but be warned this may produce a rougher surface visual than desired!
Benefits of using a paint sprayer for textured finishes
Using a paint sprayer to apply textured finishes can result in a more consistent and even coverage than using a brush or roller. The even dispersal of the spray creates fewer streaks, which is especially beneficial when achieves a thick, textured finish. Plus, paint sprayers reduce the clean-up associated with brushes and rollers. In addition, spraying is faster than brushing or rolling so you can finish your project quickly.
Paint sprayers are also excellent for achieving special effects such as simulated stucco or stone finishes that would be particularly difficult to achieve with traditional painting methods. With the right painting techniques and some creativity, you can use a paint sprayer to create custom textures that will give your project an attractive custom look.
Before starting your project make sure you select the correct type of paint for your sprayer and use quality materials for best results. You also want to avoid clogging your nozzles by always filtering the paint before applying it to the surface you’re working on. Following these best practices will ensure that you get great results when using a paint sprayer for textured finishes.
Preparing for Textured Finishes
Before using a paint sprayer to achieve a textured finish, there are several steps that need to be taken in order to get the desired results. First, the surface must be properly prepped so that the texture will adhere correctly and remain intact. Depending on the material, this will involve sanding or scuffing in order to create a rough texture. Next, a primer should be applied in order to ensure even coverage and appropriate adhesion of the texture layer.
Once the surface has been prepped, it is important to interest out and get familiar with your sprayer before you begin. If you are unsure about how to operate your sprayer or about how much pressure is necessary for certain materials, it is best to practice on cardboard before beginning a textured finish project. Additionally, it can help to practice making different patterns on scrap materials in order to become comfortable with the range of textures you can achieve with your paint sprayer setup.
Finally, make sure you have all necessary safety equipment such as respirators and eye protection as well as drop cloths in order protect any area that could potentially come into contact with airborne particles during painting. With these precautions taken, you can now begin working on achieving various textured finishes for whatever project you may have!
Surface preparation
For a successful outcome, proper surface preparation is essential in any painting project. Before you get to work with your paint sprayer, make sure that the surface you are working on is properly prepared for optimal results. So here’s a breakdown of everything you need to do in order to achieve a professional-looking textured finish.
Clean: Start off your preparation by removing any existing dust, dirt, or cobwebs on the wall. Use a damp cloth or vacuum cleaner with an appropriate attachment and then leave it undisturbed until you are ready to start painting.
Repair: Fill any cracks or holes with an appropriate filler, such as joint compound or spackle. After letting the filler dry, sand it down until it is smooth and flush with the wall’s surface. If needed add additional coats of paint and primer until you have achieved an even texture across the entire area that will be painted.
Prime: If your wall has never been painted before, it may lack enough binding properties for your textured finish to adhere properly so adding a primer is important for ideal results; this will also help protect the wall from mildew and dirt build-up over time. Your paint sprayer should have come with instructions on how much primer to apply so make sure that follow these directions closely. Allow at least 24 hours of drying time before beginning your project.
Base coat: Once everything has dried completely apply a base coat using your paint sprayer following all of the manufacturer’s instructions carefully. When choosing colors keep in mind that lighter colors tend to be more effective when achieved a textured finish so select accordingly. Wait at least 3-4 hours before applying the next coat of paint or texture medium (see step 5).
Texture Medium: This step is crucial if applying texturing mediums as part of your painting procedure because some products require specific spraying conditions; again refer back to its packaging’s instructions first before proceeding further. Apply evenly across required area according to product directions and allow plenty of time for drying between each successive layer (which can range from 15 minutes- 2+ hours depending upon product). For example try netural colored sand mixed in acrylic grit paste as one option which can help give those classic rustic tones desired.
Choosing the right paint and texture materials
When choosing the right paint and texture material for your project, there are some important things to consider. Choose a paint that is oil-based or an acrylic-latex blend, as these will work best with a textured finish and help ensure a durable surface. The base coat of paint should be at least semi-gloss so that the texture materials stick easily to the existing surfaces. Additionally, make sure to choose the correct type of texture material for the desired effect — everything from beads and granules to rocks and sand can be added for various effects on ceilings and walls.
For ceilings, many people prefer to use acoustic or popcorn texturing material for a more subtle, spongy look that can also help reduce noise absorption in the room. This type of material may require a much thicker base coat than other types of textures because it requires a large amount of adhesive to hold it in place when sprayed on. Make sure to follow manufacturer’s instructions carefully before beginning your project with this type of product or technique.
For walls, there are many options in terms of textures including stippling, splattering, combing and painting with rollers or texturing tools — even orange peel textures can be applied with a HVLP sprayer! When choosing one of these methods you need think about size differences first—although small patterns like stippling will only require small amounts of paint they may get lost on larger surfaces easily, while larger patterns like orange peels or splatter designs may not show up depending on the size and surface type you’re working on. The most important factor is to use high-quality materials such as heavy duty plastic bags filled with texture material and sealing tape if needed to prevent any leaks from occurring when spraying your texture onto surfaces. Always ensure you have ample ventilation during application too!
Safety precautions
Before you begin to use paint sprayers, it is essential to take the necessary safety precautions. While there are many types of paint guns on the market, all require a basic level of safety and protection from any flying droplets of paint.
It is best practice to wear personal protective equipment (PPE) when using a paint sprayer. This includes goggles and face shields for protecting your eyes, thick gloves for protecting your hands, and appropriate clothing including long-sleeve shirts, trousers, boots and breathing protection for avoiding inhalation of potential fumes.
There are also environmental considerations to be aware of before you begin spraying with a paint sprayer – ensure that ventilation is adequate in the work area. Specially designed extractors are available which work to extract any excess aerosols present in the air while spraying – this can help reduce any potential fire hazards or health risks related to ingestion or inhalation of paint particles or fumes. Lastly, using an appropriate respirator can also be effective at further reducing exposure as well as offering extra protection against any potentially harmful agents in the environment.
Maintenance and Cleanup
It is essential to properly maintain and clean your sprayer after each use. Failing to do so can cause damage to the internal parts of the unit, resulting in poor performance and waste of materials.
For basic cleaning and maintenance procedures:
1) Remove paint from the air cap and all other exposed metal parts using mineral spirits or paint thinner.
2) Use an approved solution to clean all internal surfaces, including filter screens inside the air cap.
3) Dilute a cleaner like foam wash or detergent in water, then use compressed air or slow flow of water pressure (6-10 psi) to direct it through all internal passages while spraying it out through the nozzle tip on a test surface. This will help remove any residual material that has dried up inside.
4) Check for any signs of wear on moving parts like seals, O-rings, and packing nuts and replace if needed.
5) Lubricate moving parts with recommended lubricants (for air operated models).
6) Store sprayer in a dry area with all cleaning supplies used for spraying stored separately from those used for maintenance or repair purpose only.
Cleaning the paint sprayer
Using a paint sprayer produces an even, professional-looking finish but you may find it takes more time to properly clean and maintain the device. This guide covers cleaning and upkeep for your paint sprayer to ensure it works flawlessly for any project.
Before starting any painting project with your paint sprayer, inspect the device to make sure there are no worn or damaged parts that should be replaced first. If necessary, repair or replace any broken parts before beginning the cleaning process.
Cleaning a paint sprayer requires several steps in order to ensure all traces of old or dried paint are removed from the device’s chambers and hoses. After each use, you’ll want to rinse out your system with mineral spirits in order to liquefy remaining paints so they can be wiped away with cloths. After rinsing, assemble all pieces of the system and fill it with fresh mineral spirits without turning on the machine. Once assembled, run the machine for one minute at low pressure in order to flush out all residue from previous paint jobs.
Once completed, empty out contents from tank and thoroughly rinse it using soap and warm water before allowing fully dry before assembling again. Assemble painted bits back into tank area while dry so they don�t get exposed to excessive moisture leading possibly to deterioration over time. Clean out hose ends by attaching nozzle cleaner kit onto hose connection threads and running pressurized air through them until all residue is passed through ensuring not blockage in tubes will impede spraying success at later date. Finally once everything has been sufficiently cleaned, store until next usage session making sure always keep insect-free environment in order for avoid contamination at later date preventing failure of painting tasks future.
Following these cleaning tips will help your paint sprayer last longer while still delivering great results!
Storing the paint sprayer
After you are finished using your paint sprayer, be sure to properly store it for future use. It is important to clean the paint sprayer before storage, so that its components will remain in optimal condition for your next job.
Firstly, make sure that any remaining paint has been fully drained from the spray gun and the hose of the sprayer. If there is still an abundance of paint left inside, you can use a thinner to flush out any residual material in the internal parts of the device. This prevents clogging or corrosion caused by hardened layers of dried paint.
Once cleaned, lightly oil all metal surfaces such as pumps and valves. This helps to ensure a more reliable performance in subsequent uses and reduces wear and tear on the machine’s moving parts.
Be sure to store your paint sprayer upright in a cool dry place; away from any exposure to direct sunlight or moisture buildup.
Tips for Achieving Professional Results
When it comes to achieving professional results with a paint sprayer, the key is to understand what techniques you can use to get the most out of your spray gun. There are several tricks and tips you can try that will help you achieve an even and textured finish every time. Here are some tips for getting the most out of your painting project:
- Practice spraying before starting your project so that you can develop good technique and become familiar with how the spray gun works. Make sure to practice in an area that is not part of the finished project.
- Start by thinning paint according to manufacturer’s instructions, then adjust as needed depending on how well it covers and sprays. Thinner paint will create more even coverage while thicker paint may provide more buildup of texture.
- Use masking tape and paper to protect areas like trim and window panes from splatter as desired when using a sprayer indoors or in enclosed spaces, proper protection is important!
- To ensure optimal coverage along corners and hard-to-reach areas, opt for a smaller tip size or oval pattern nozzle so the part of the pattern that hits the surface is more precise than with a standard fan patterned nozzle attached to a thick tip. This technique also helps avoid stripes or bleed-through from overlapping patterns found in wider patterns for much thinner applications such as lacquer or stains used for wood projects
- As you work through larger projects like walls, use careful overlap – approximately 50% – when spraying one section against another, avoiding any direct lines from being created between sections by allowing one section’s edge blend in slightly with another’s so that no direct line appears between them once completely dry.
Practice and experimentation
If you’re looking for a textured finish on your surfaces, spray painting can be an effective and efficient way to achieve this. Spray painting is a great option for covering large areas quickly, it’s also possible to create unique effects with paint sprayers. Obtaining the right texture when spraying can take some practice and experimentation, but once you get the hang of it you will be achieving stunning depth and texture in no time.
Here are some tips that can help you to achieve perfect results with your paint sprayer:
-Practice on scrap pieces of wood or cardboard before starting on an actual project. This is important as it gives you an opportunity to get used to the sprayer and how different settings affect the look and feel of the finished product.
-Choose a low pressure setting for more textured finishes such as stucco, masonry or textures that resemble carpet. The lower pressure also helps reduce overspray, making clean up easier.
-Keep the distance from the surface consistent in order to avoid streaking or blotching. This will also ensure more even coverage on your textured surfaces.
-Experiment with different techniques until you have a good feel for how each one works and what type of effect it creates – turn off any fans or air conditioners that may blow particles around, as this may interfere with your spraying efforts.
-Choose the right consistency of paint so that it comes out smooth without being too thin or thick; runny paint can cause splatter while thicker consistency may not go through your nozzle properly.
Attention to detail
When it comes to achieving a textured finish with a paint sprayer, attention to detail is key. To ensure you get the best results, here are some tips on how to make sure that your textured finish gets the desired look.
First and foremost, make sure that the surface of your area is properly prepared before beginning your painting process. Check for any cracks or defects in the wall and fill these with spackling or joint compound. All surfaces should be sanded down with 180-grit sandpaper to achieve a smooth finish before painting. Depending on the type of texture you are looking for, use either a splatter texture, skip trowel texture, or popcorn texture to blend in any minor imperfections that still may be present.
Once you’ve prepped your walls and determined what type of texture you prefer for your project, apply an even coat of paint with a paint sprayer by moving it back and forth over the surface. Be sure to follow all manufacturer instructions regarding appropriate distance when spraying as this can affect how textured the final result will be. Allow each coat to dry completely before applying new coats and if necessary use a brush or roller around edges as well as hard-to-reach corners of walls upon completion.
For more intricate finishes such as swirls, stippling or sponging techniques must be used going in various directions on the same surfaces until desired effect is achieved. You can even add paint additives such as light weight spackle for sandstone textures or liquid wax for marble and stone finishes – but only use these if recommended by product directions! Finally, allow all painted surfaces time to dry completely before ever touching anything newly painted – no matter how tempted you may get!

Conclusion
Achieving the perfect textured finish with a paint sprayer takes some practice and patience, but following these steps should make the job easier. Before beginning, always make sure you have the right tools and supplies needed to get the job done.
Start by preparing the surface to be coated, making sure that it is dust-free and debris-free before adding any type of material to it. Use a pressure gauge to control your air pressure before spraying, and always cover your surroundings with plastic sheeting or newspapers.
Experiment with different materials to achieve the look you want, keeping in mind that larger materials will tend to give more texture than smaller materials. Keep moving continuously during spraying for even distribution, and keep your sprayer tip at least 6 inches away from surface you’re covering in order to prevent any possible clogs or unevenness.
Finally, clear all excess material from both inside and outside of the sprayer promptly after use so it can be used again in the future without any problems.
With patience and practice you can achieve amazing textured finishes each time you use a paint sprayer – good luck!
FAQ’S
How do you make a spray paint look textured?
One way to make spray paint look textured is to use a textured spray paint or apply a textured topcoat after the paint has dried.
Can I use my paint sprayer to spray texture?
Yes, you can use a paint sprayer to spray texture by using a texture spray gun attachment or by adjusting the nozzle to create a textured pattern.
How do you make textured paint finish?
Textured paint finish can be made by mixing sand, joint compound or other textured additives into the paint, or by applying a textured topcoat after the paint has dried.
How do you texture a wall with a sprayer?
To texture a wall with a sprayer, you can use a texture spray gun attachment, adjust the nozzle to create a textured pattern, and adjust the air pressure and texture material flow.
What is the best pressure to spray texture?
The best pressure to spray texture depends on the type of texture material being used, but a typical range is between 20 and 40 psi.
What can I use for spray texture?
Spray texture can be made from a variety of materials, including drywall joint compound, texture mix, or specialized texture spray cans.
How do you make a painting look like it has texture?
To make a painting look like it has texture, you can use techniques such as impasto, dry brush, stippling, or using textured mediums.
How do painters add texture to their work?
Painters add texture to their work by using techniques such as impasto, sgraffito, glazing, or using textured mediums.
Does spray texture need primer?
It depends on the surface and type of texture material being used. In some cases, primer may be necessary to ensure good adhesion and a smooth surface for the texture to be applied to.
What is a texture spray gun?
A texture spray gun is a specialized spray gun designed for applying textured materials such as joint compound, texture mix, or other spray textures. It typically has a larger nozzle and adjustable settings for texture flow and pattern.
See Also:
- Best hvlp paint sprayer
- Best paint sprayer for cabinets
- Best cordless paint sprayer
- Best paint sprayer attachment for air compressor
- Best airless paint sprayer


